
Submit Timesheet
This training will equip you with the skills to efficiently manage your timesheets using Office 1 Solution.
Go to app.office1solution.com
1. Introduction
You will learn how to add, edit, and submit timesheet entries accurately to ensure proper tracking of your work hours.
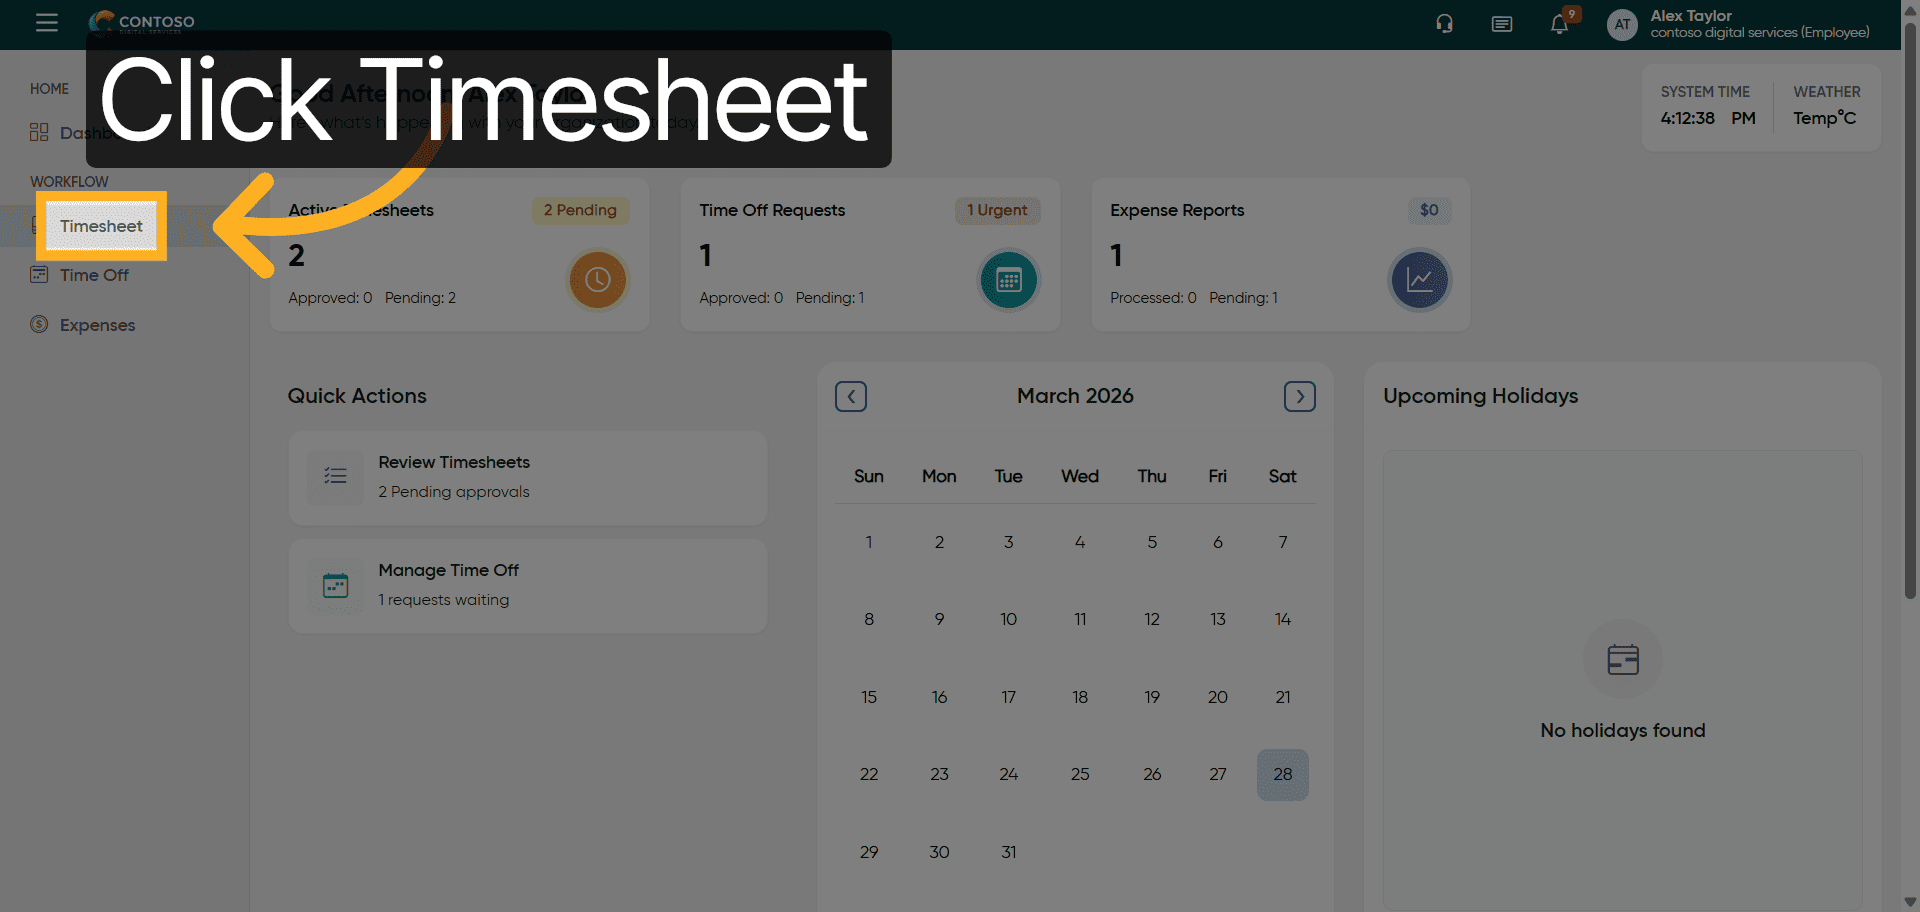
2. Access Timesheet Section
Click the Timesheet section to begin managing your work hours.
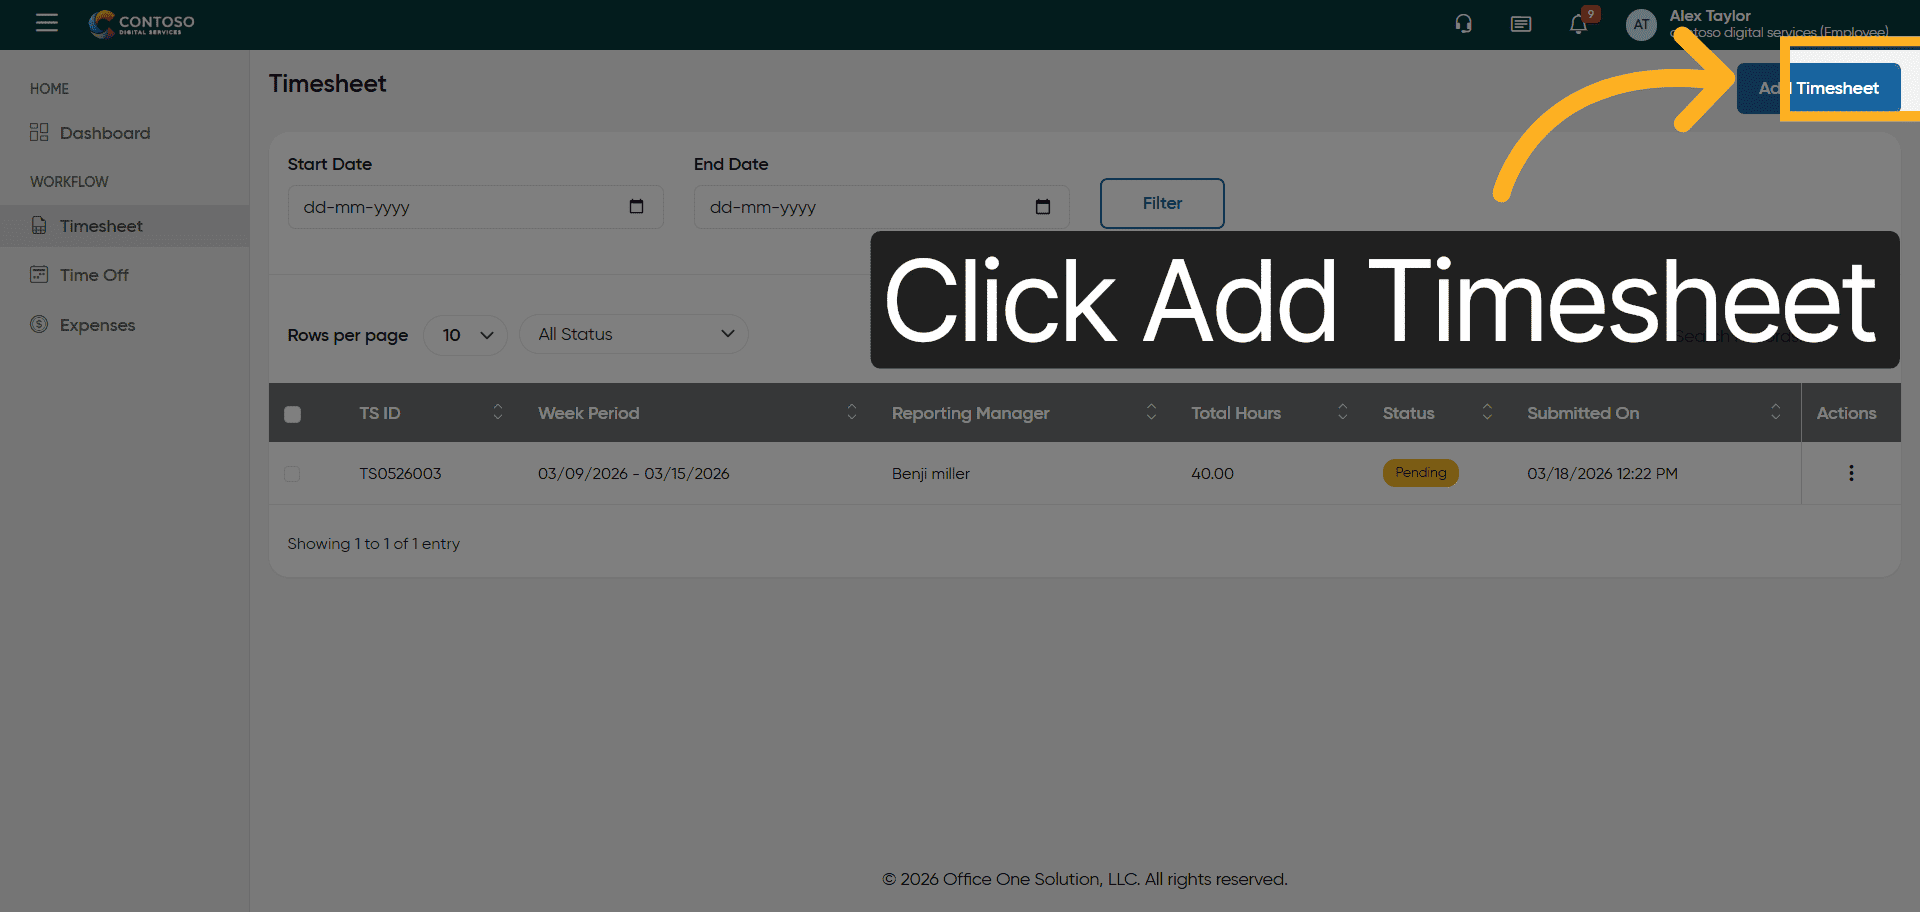
3. Open Add Timesheet Form
Click the Add Timesheet button to create a new timesheet entry.
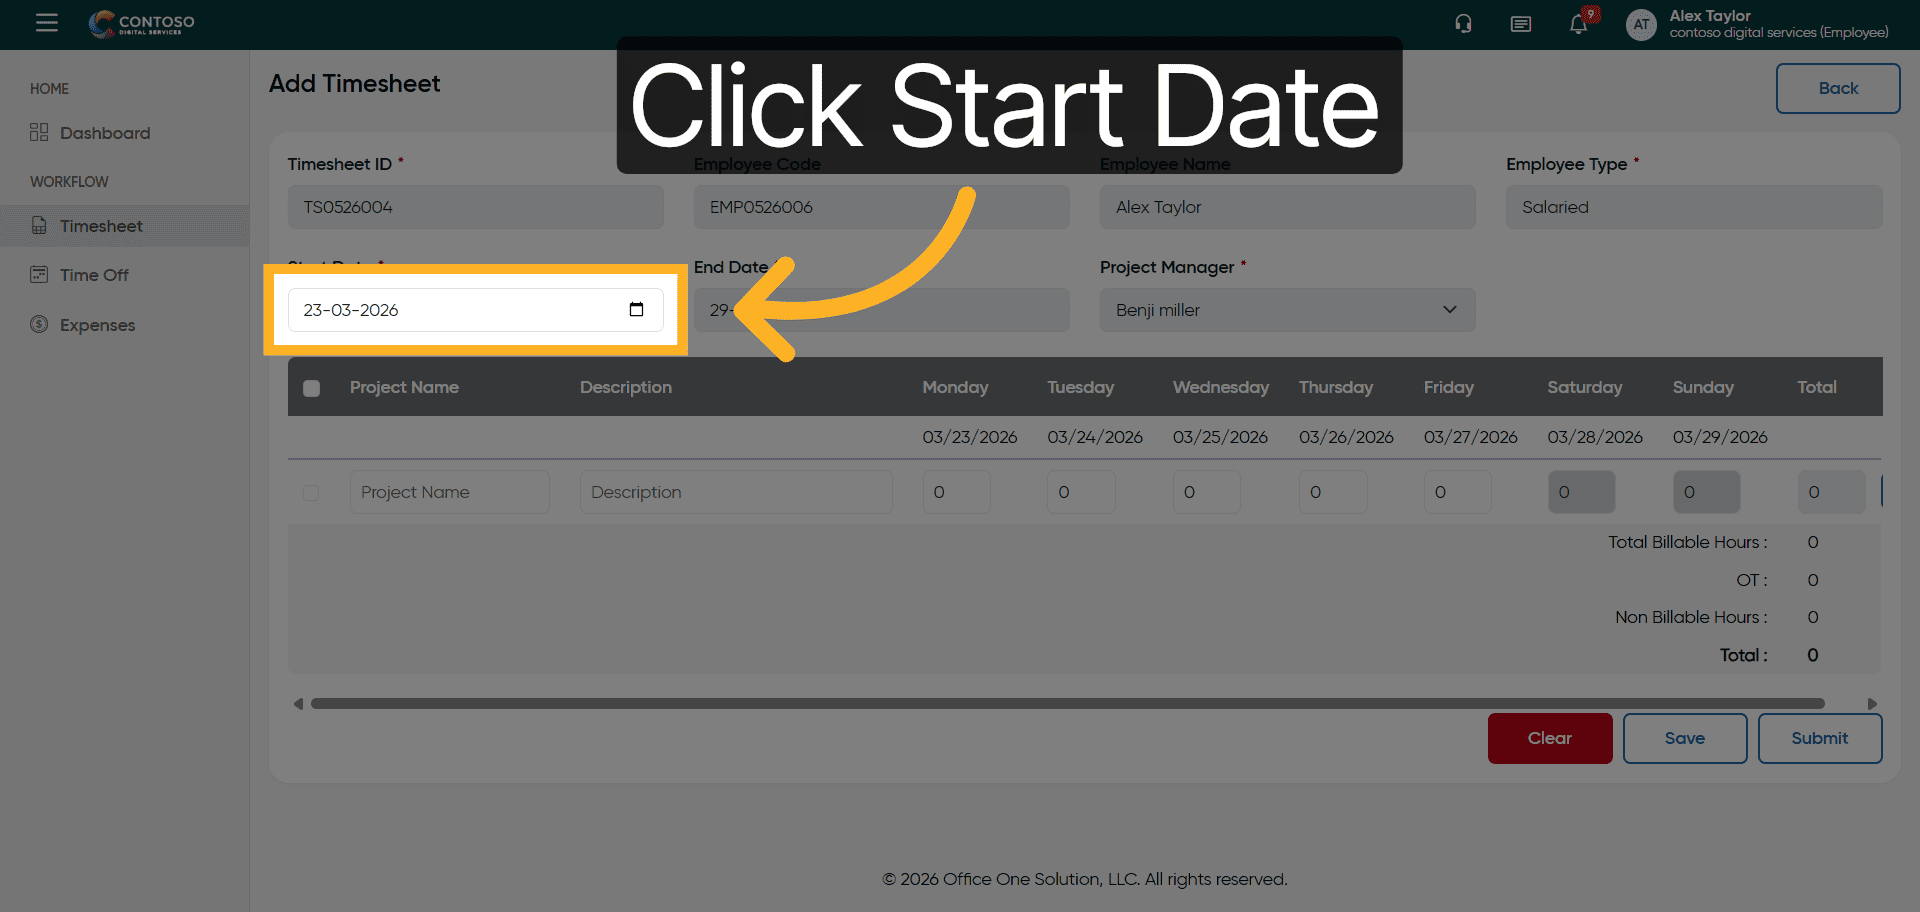
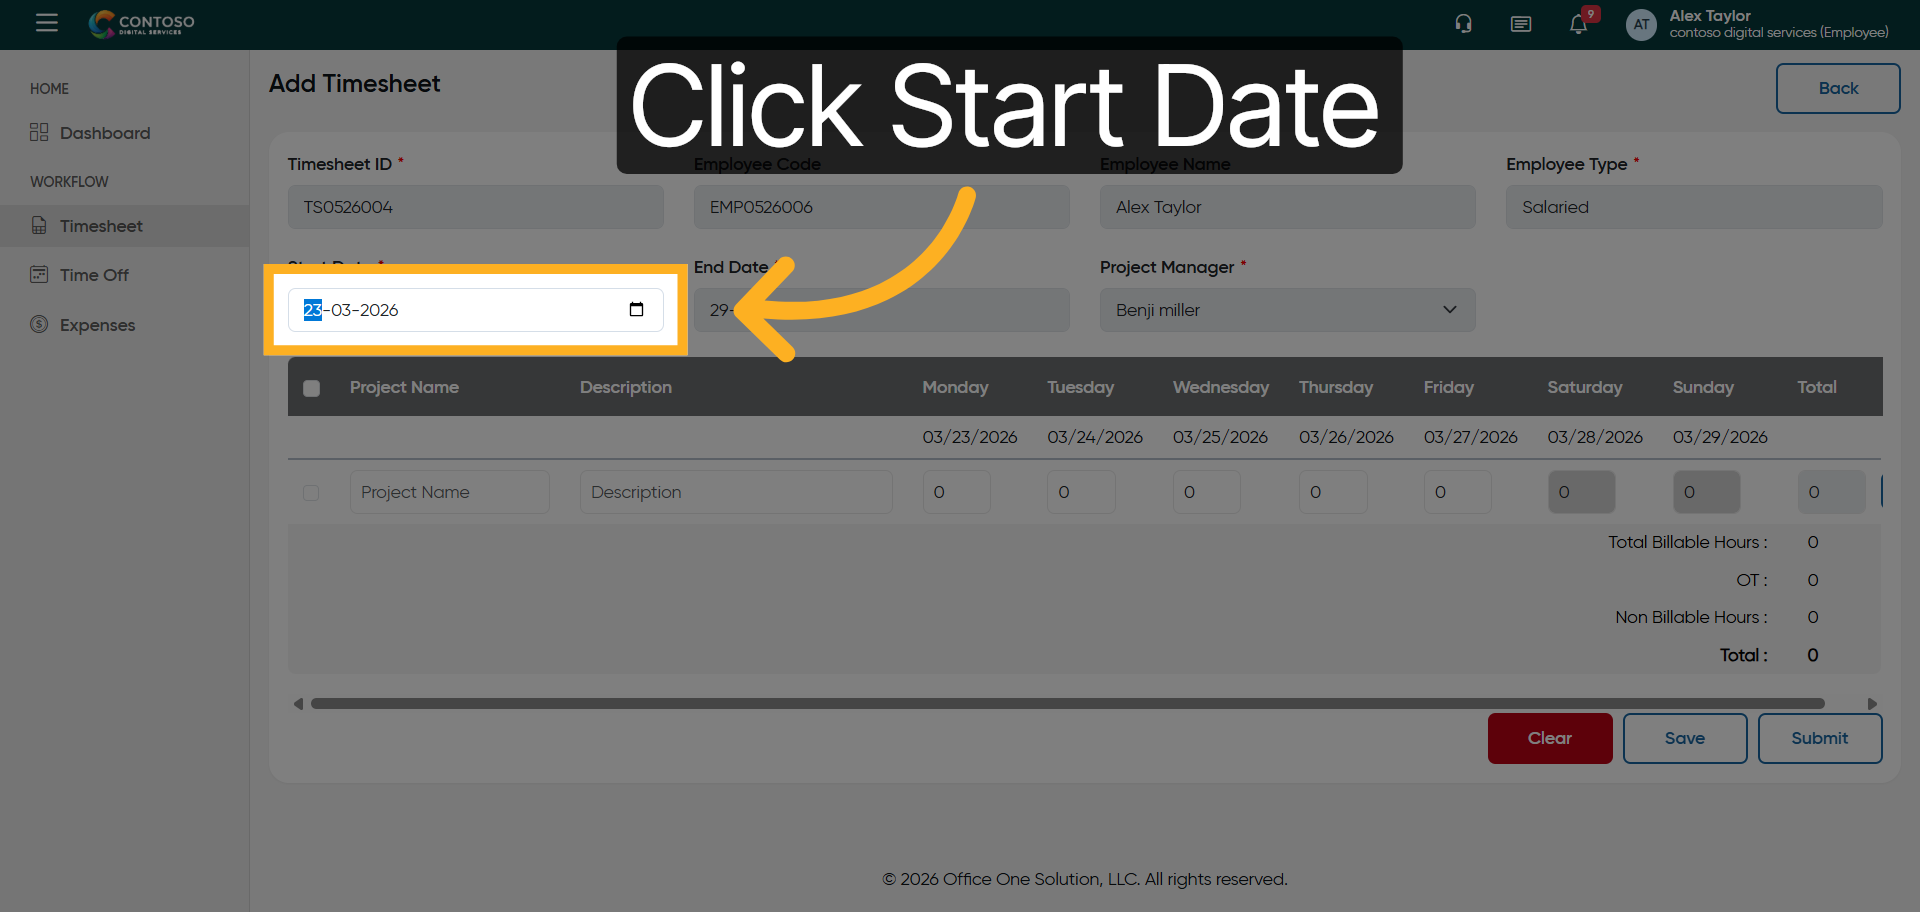
4. Select Start Date Field
Click the Start Date field to specify the beginning date for your timesheet entry.
5. Reopen Start Date Picker
Click the Start Date field again to adjust or confirm the selected date.
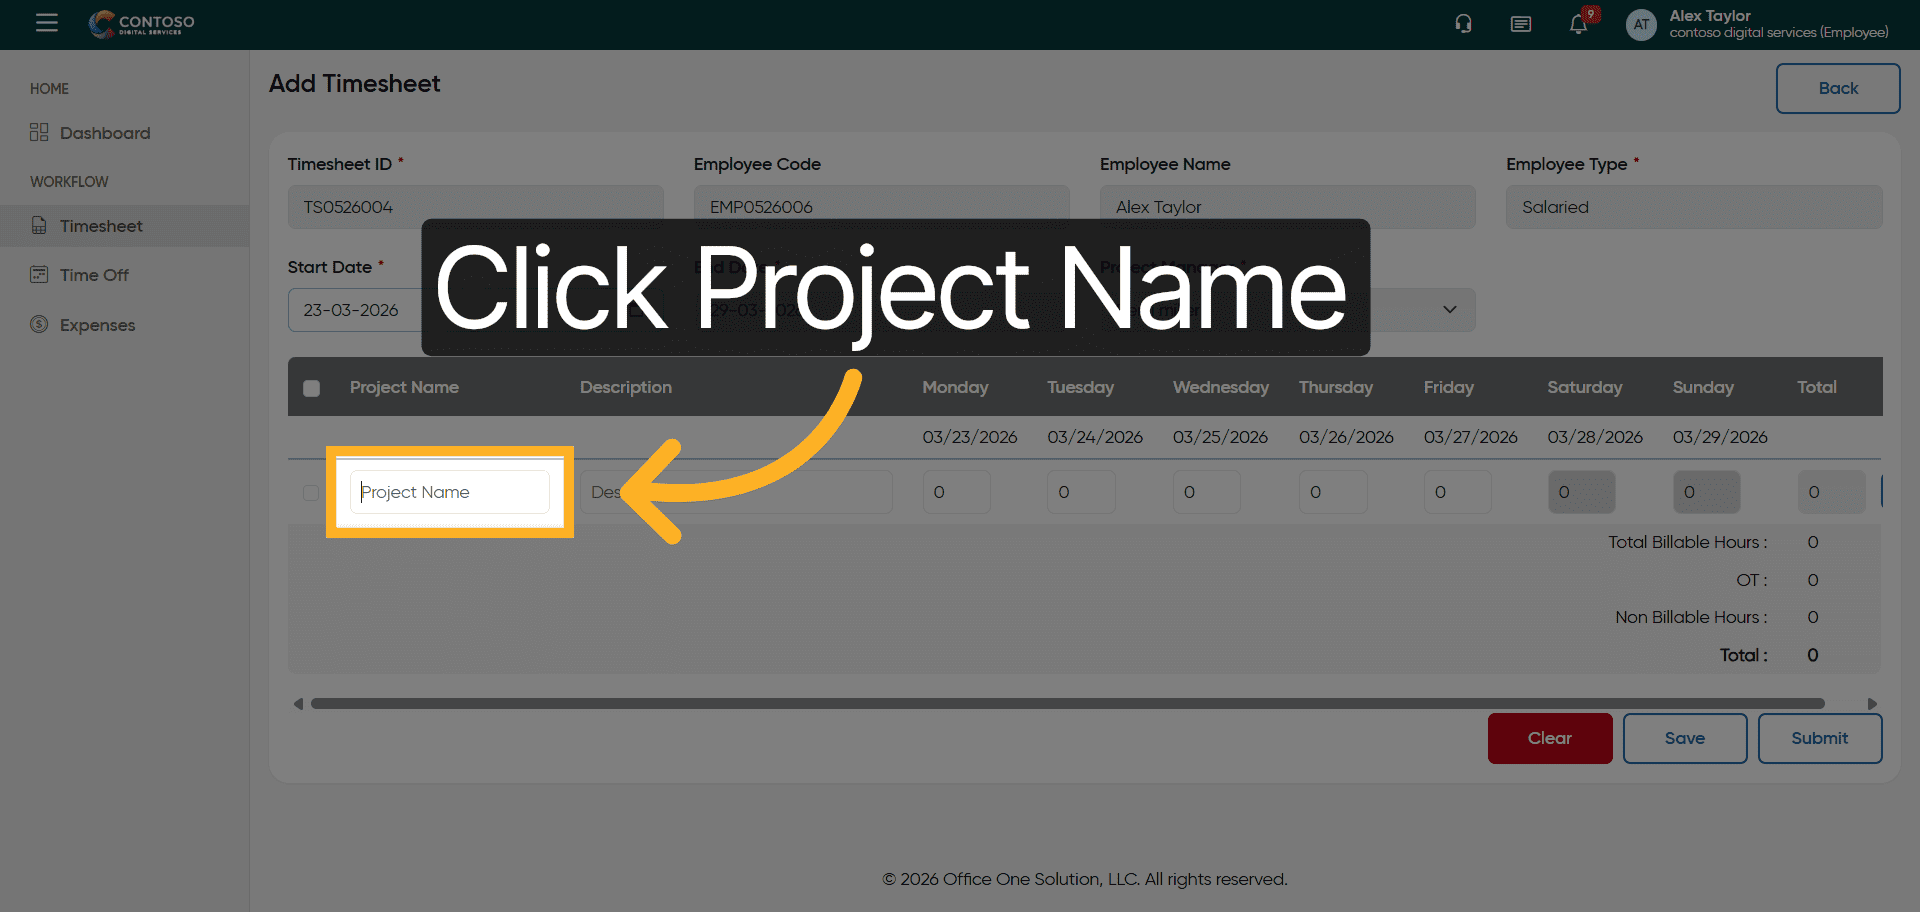
6. Choose Project Name Field
Click the Project Name field to select the project associated with your timesheet.
7. Enter Project Name
Enter your project name in the Project Name field to identify the work assignment.

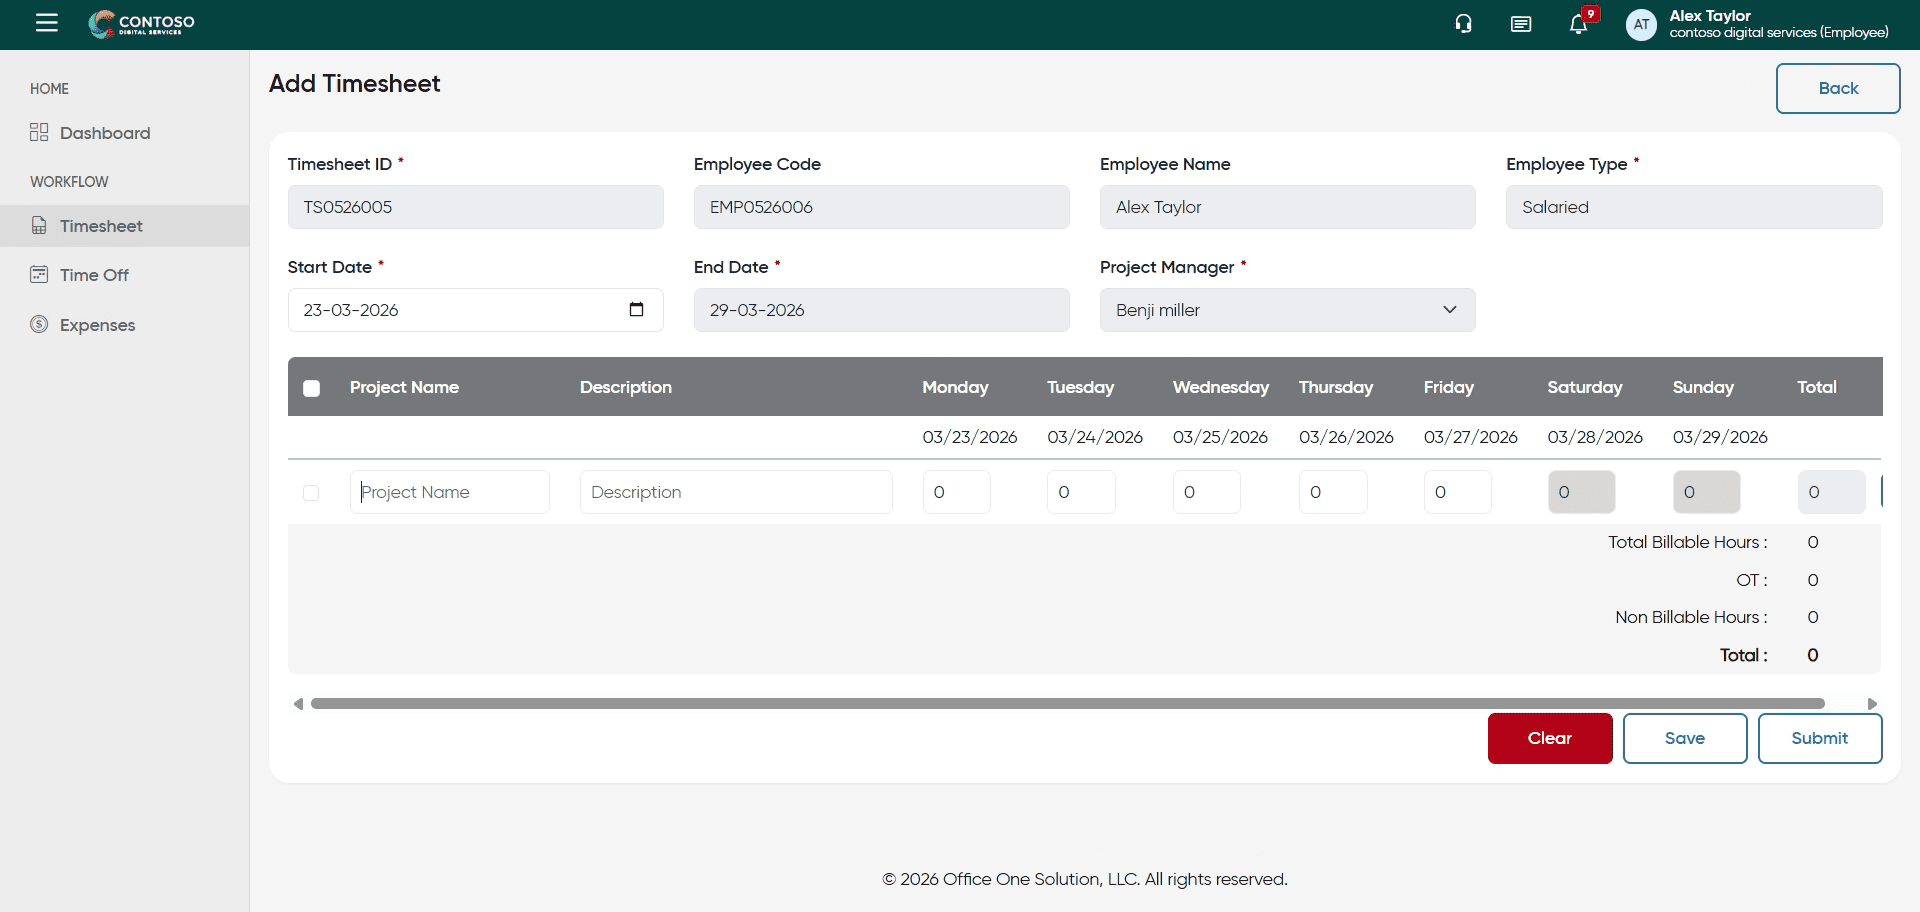
8. Specify Work Category
Enter the work category, such as Development, to classify your timesheet entry.

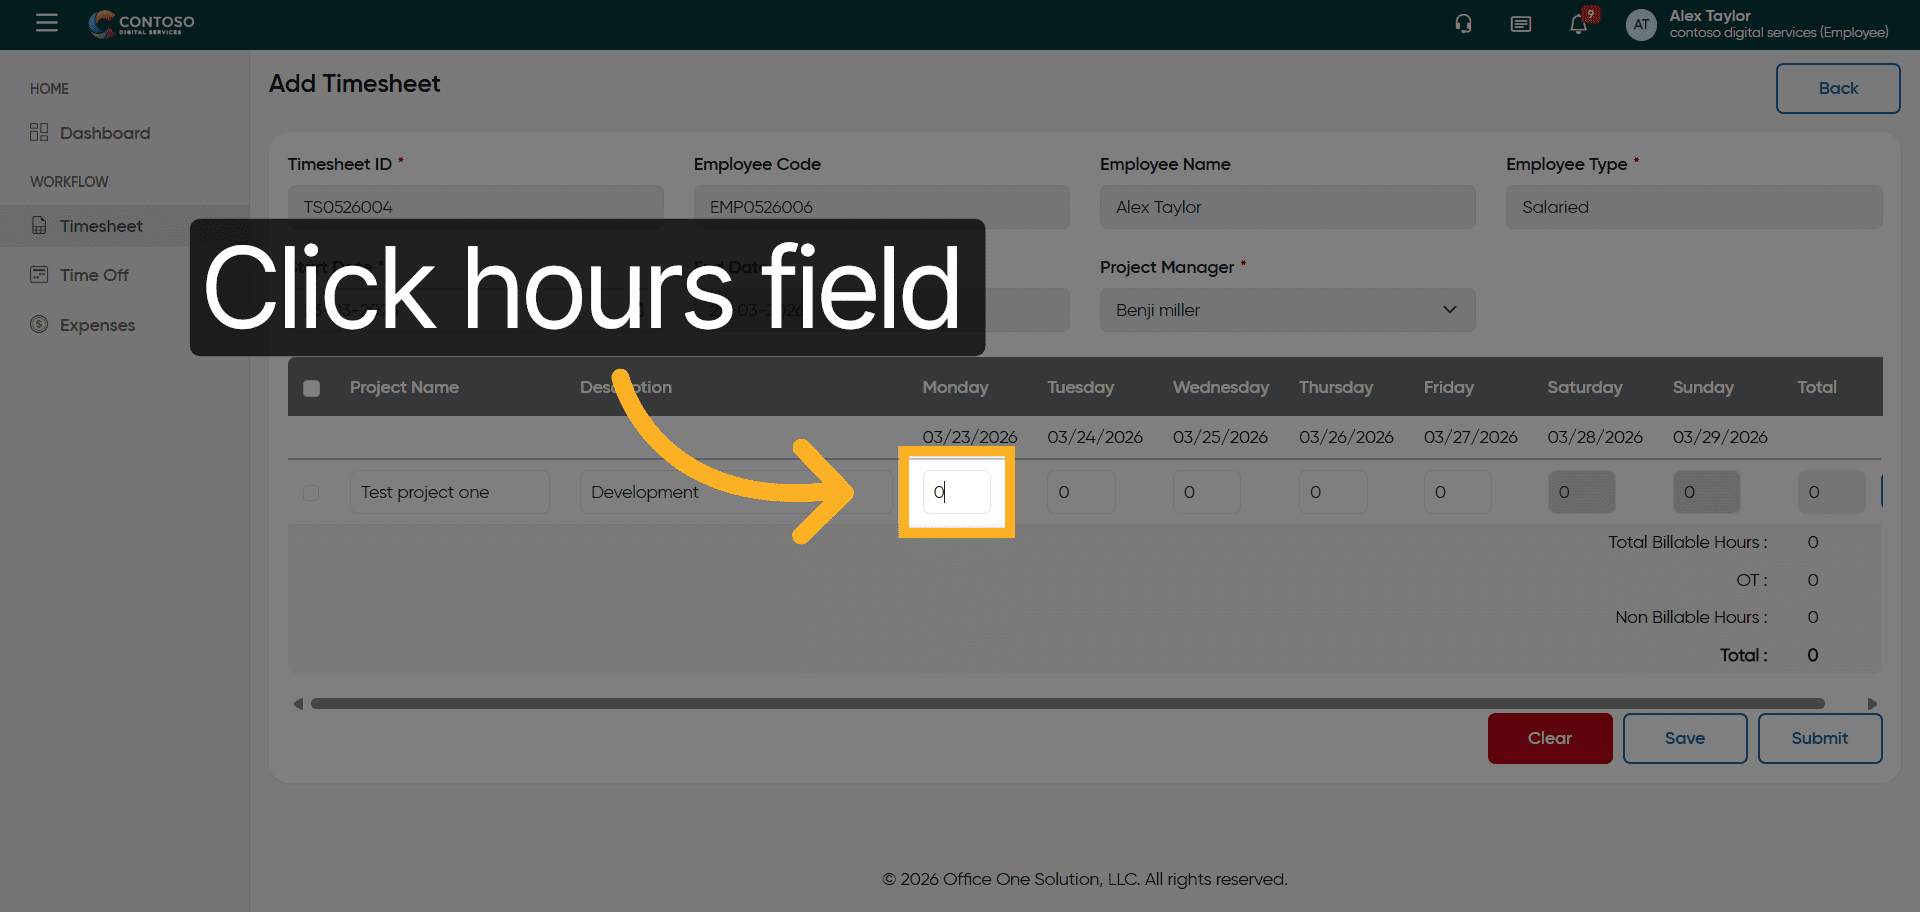
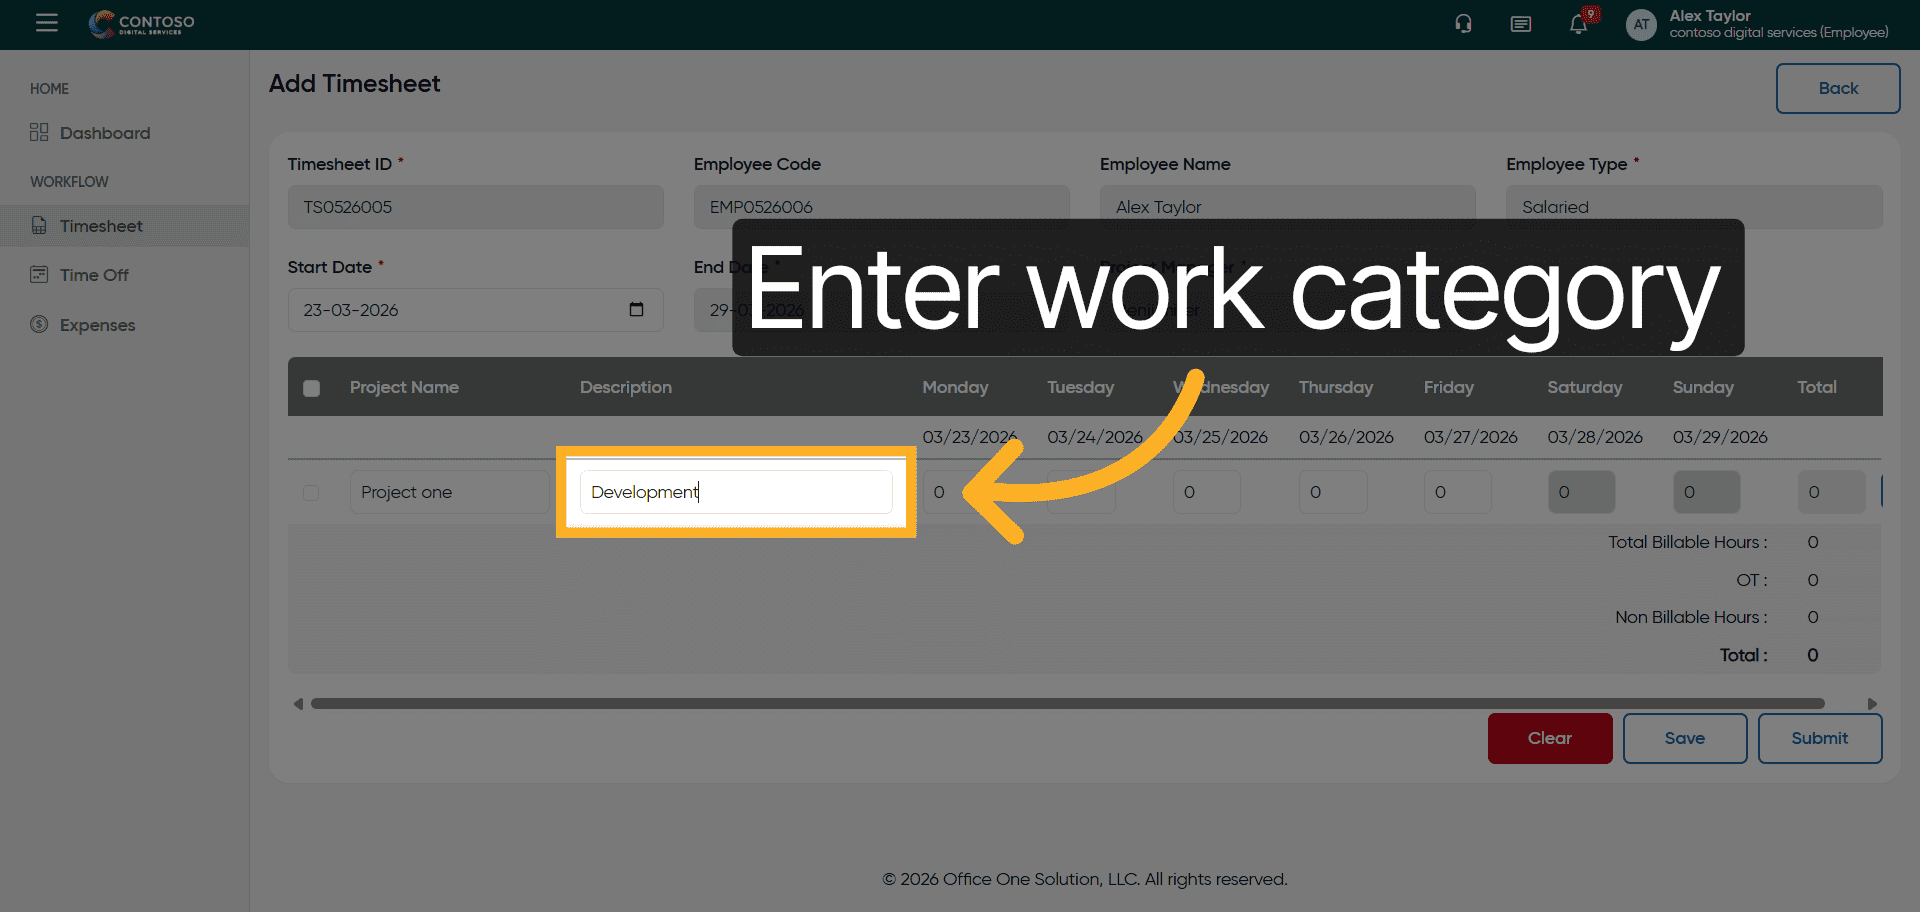
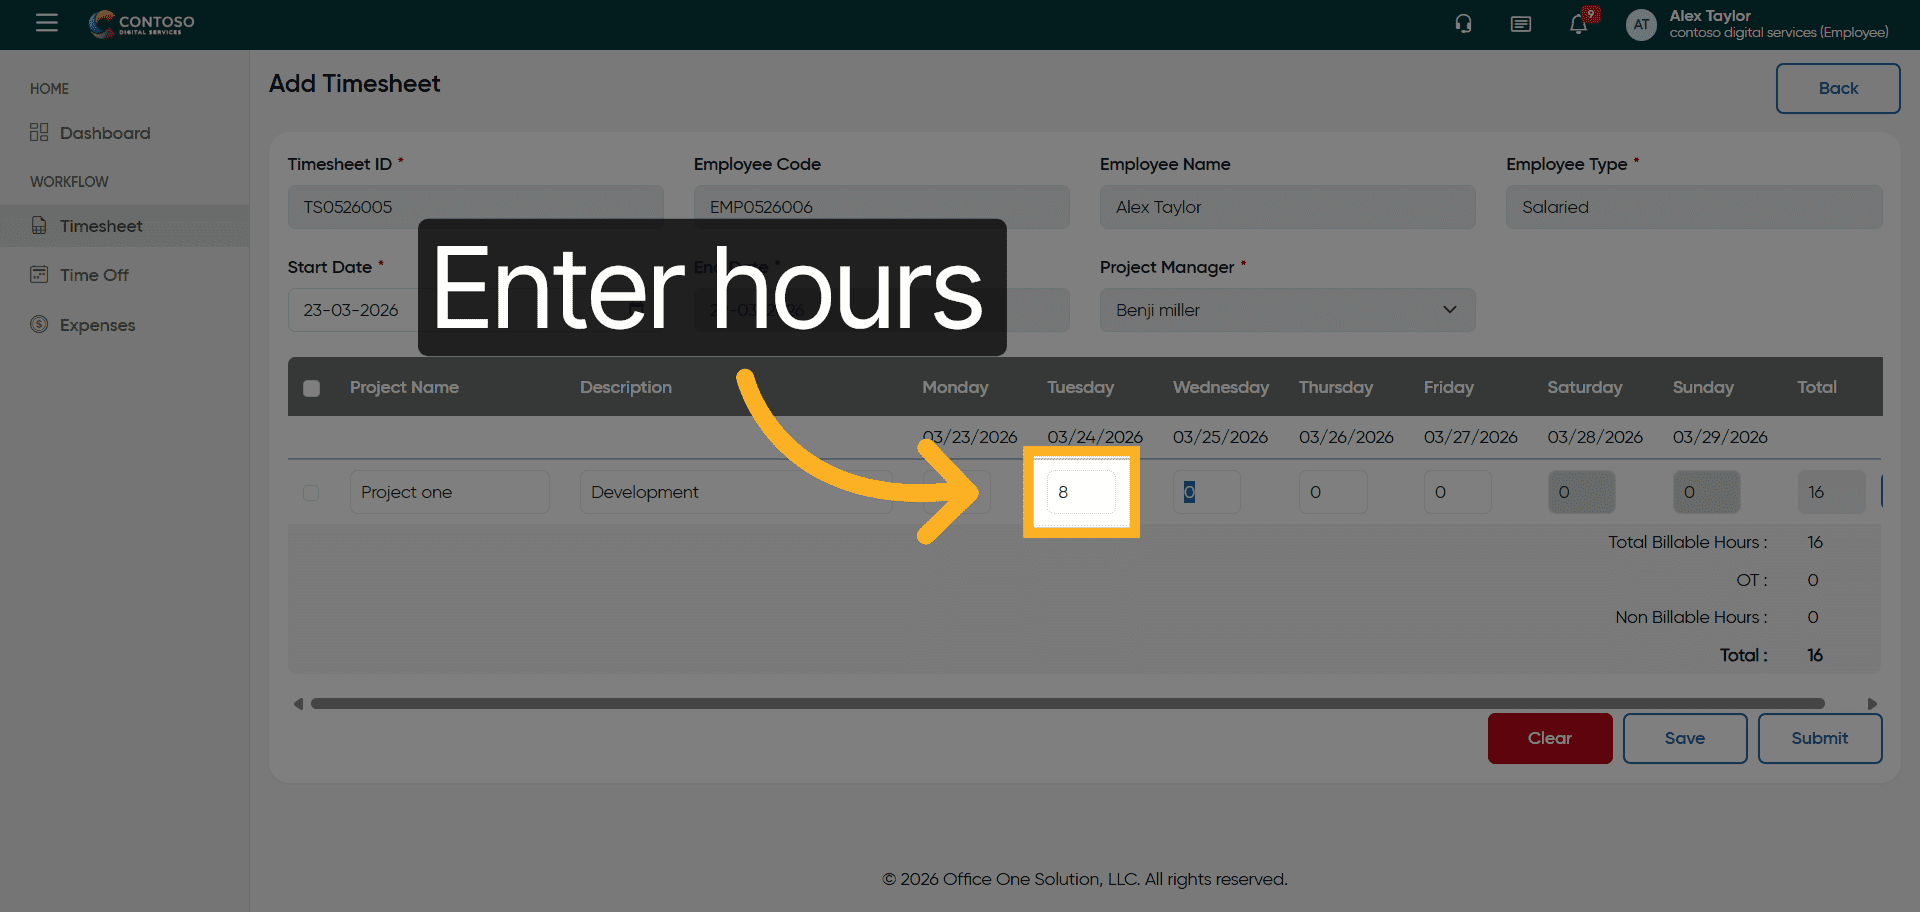
9. Select Hours Field
Click the hours field to input the number of hours worked for the selected date and project.
10. Enter Hours Worked
Enter the number of hours you worked, for example, 8 hours, in the hours field.

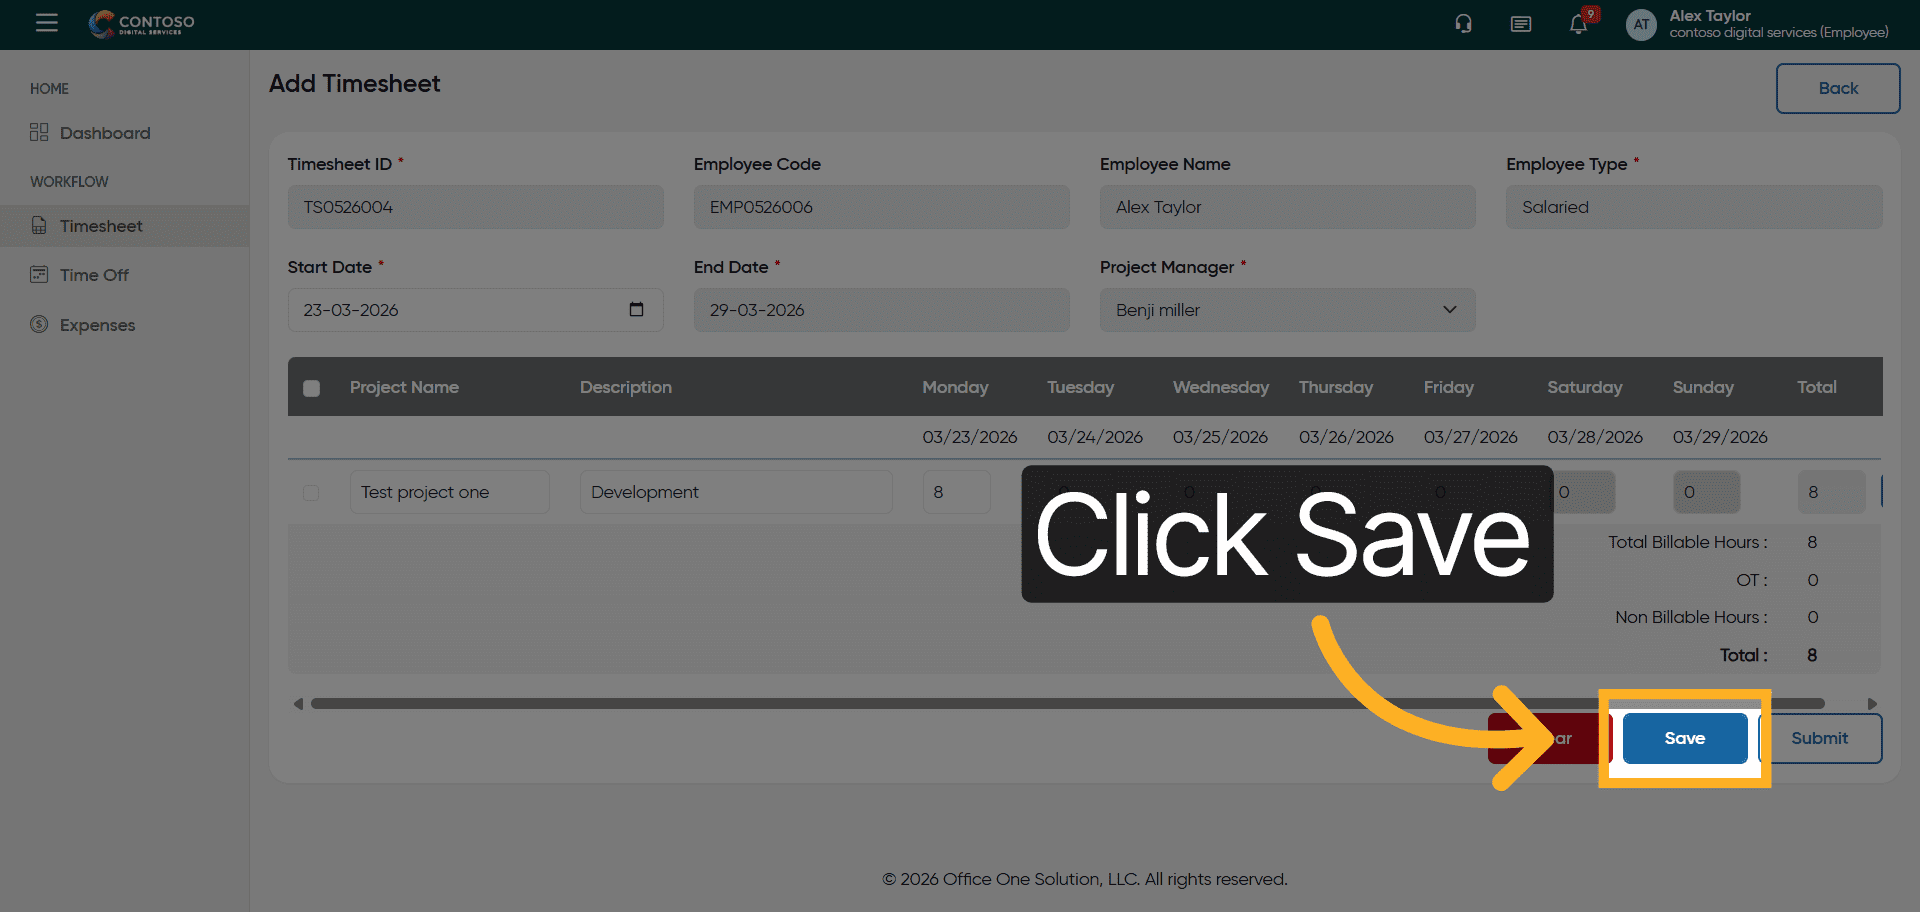
11. Save Timesheet Entry
Click the Save button to store your timesheet entry and update your records.
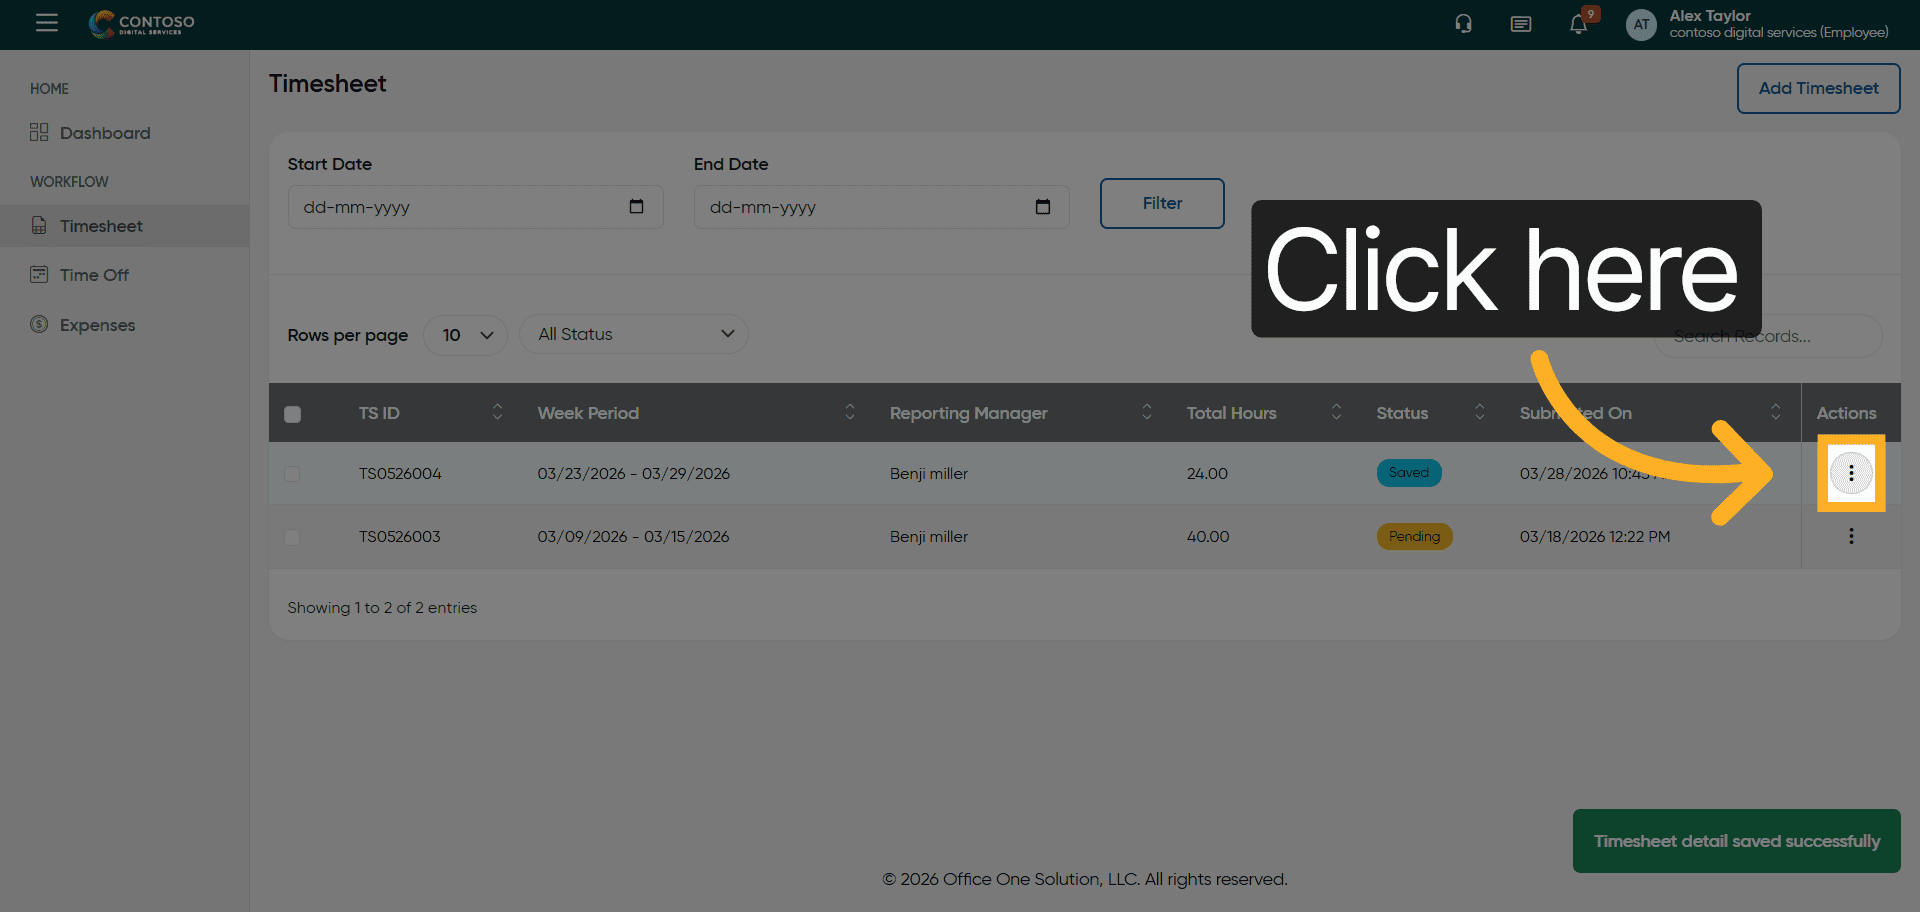
12. Access Timesheet Options
Click here to access additional options for your timesheet entry.

13. Open Edit Mode
Click the Edit button to modify your existing timesheet entry.

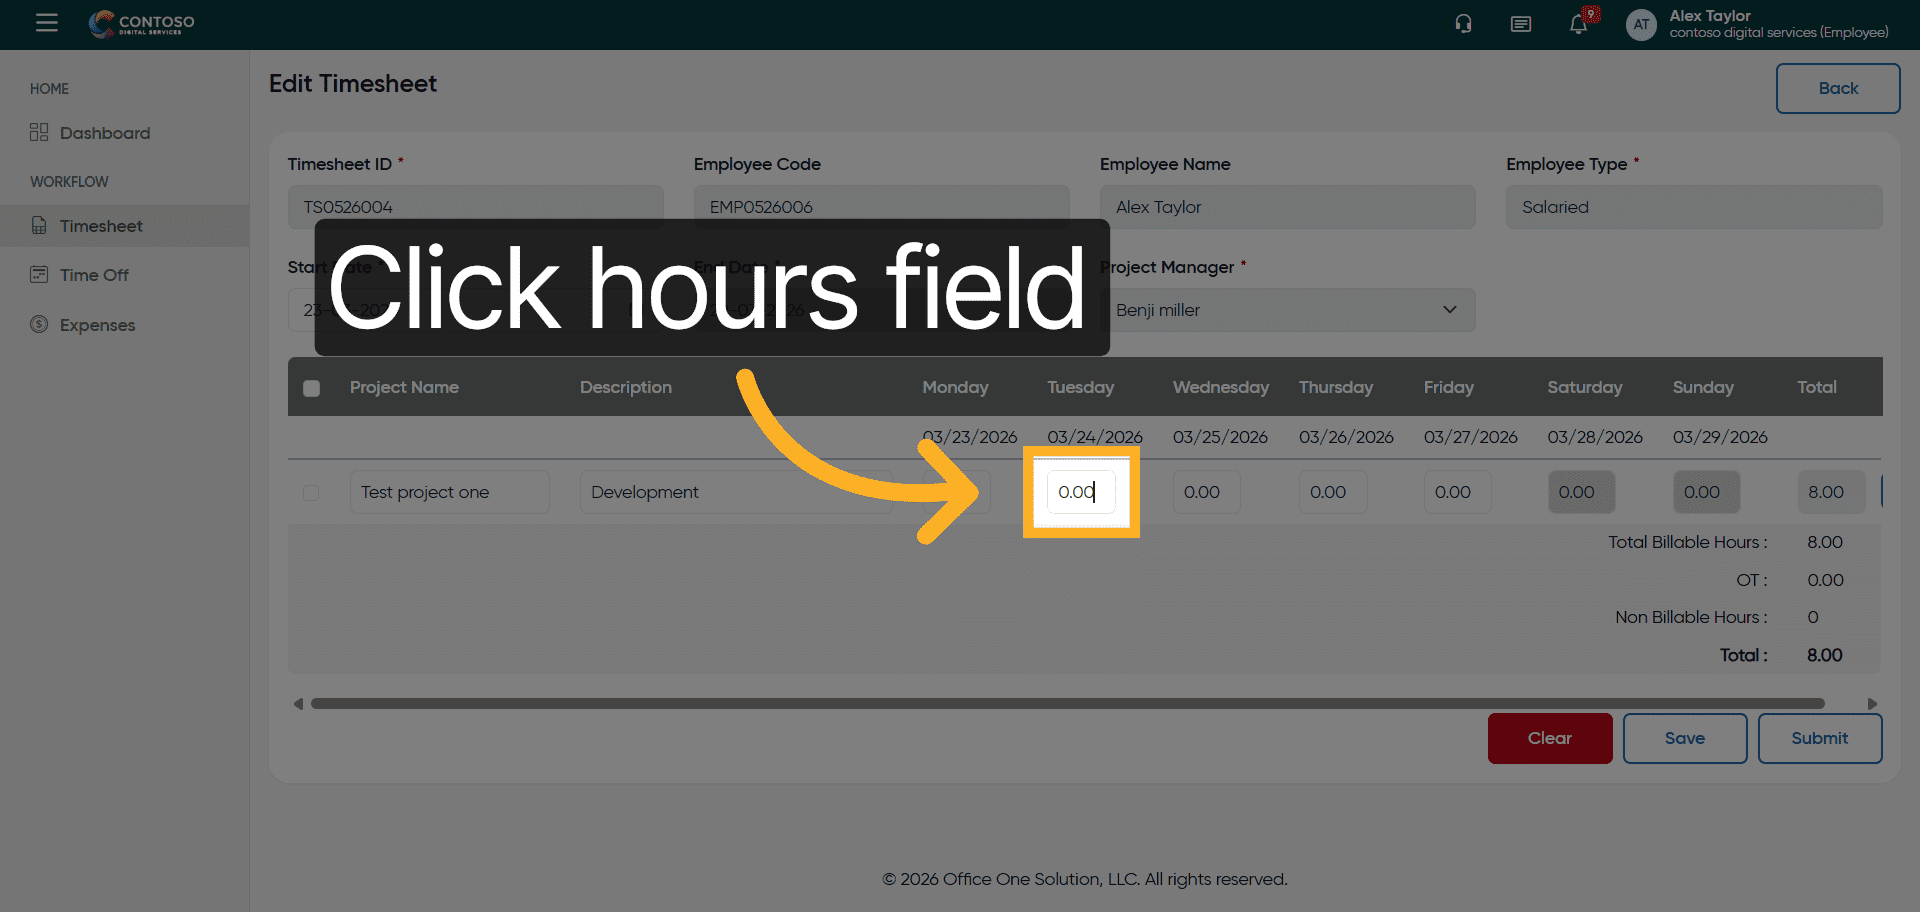
14. Select Hours Field for Edit
Click the hours field showing 0.00 to update the recorded hours.
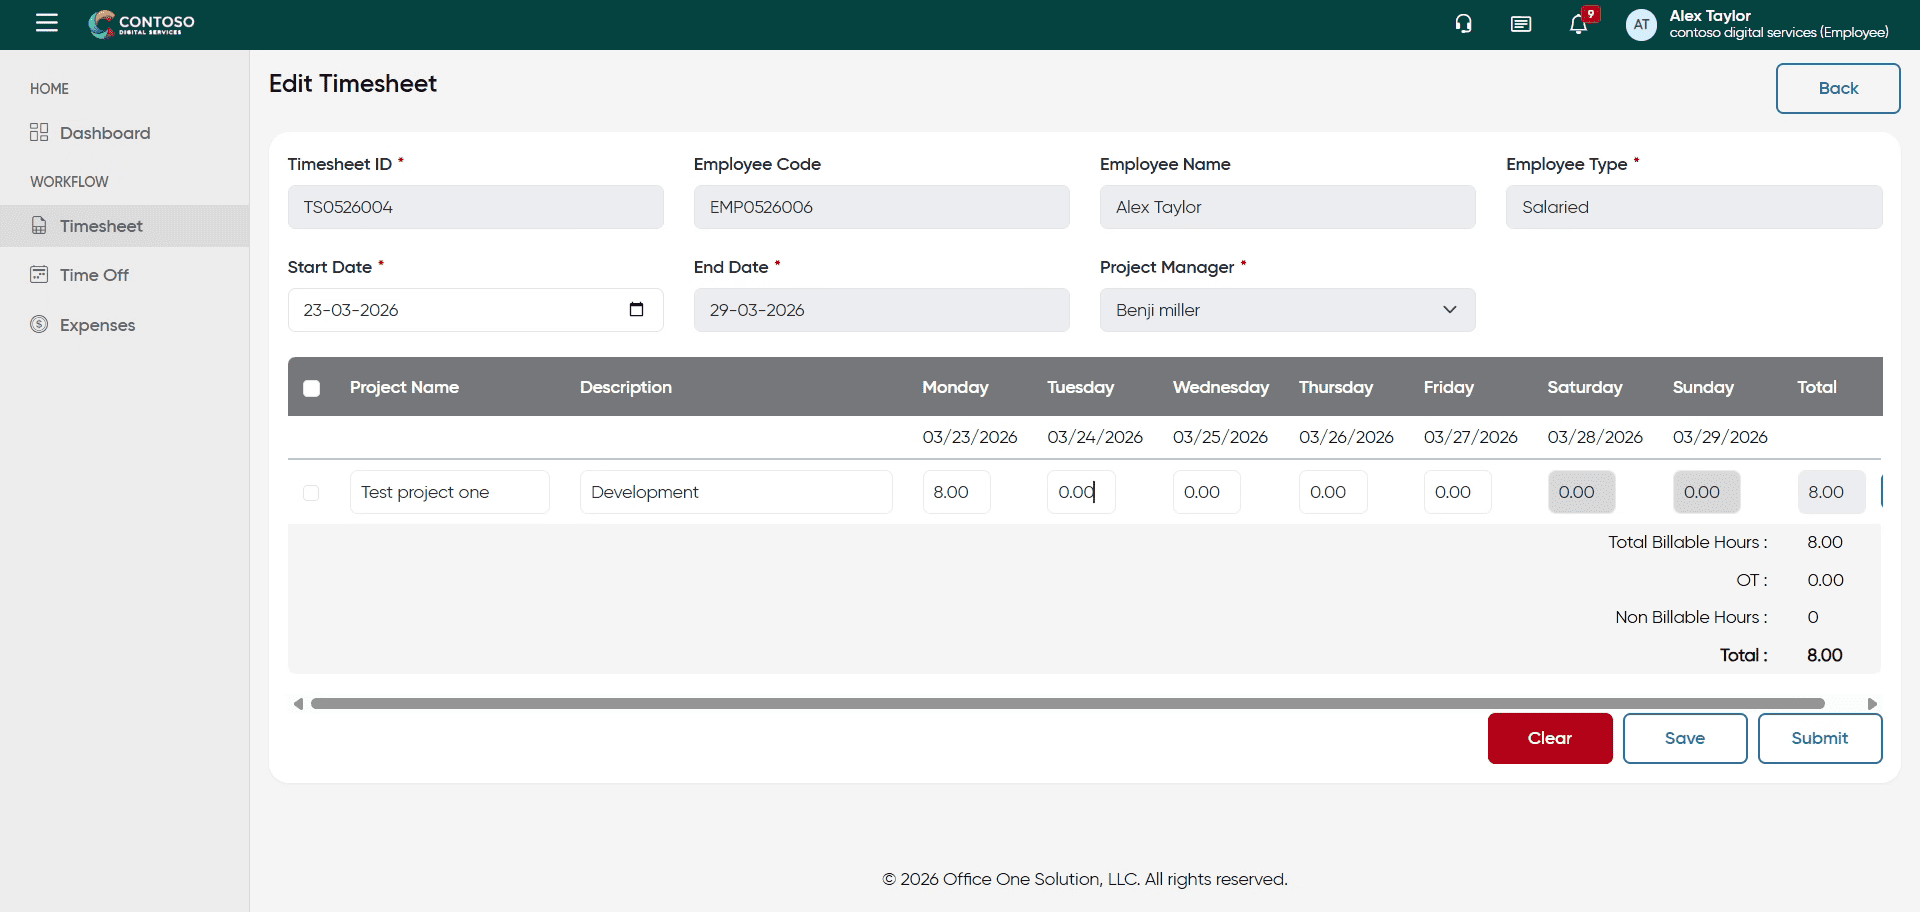
15. Update Hours Worked
Enter the updated number of hours worked, such as 8, in the hours field.
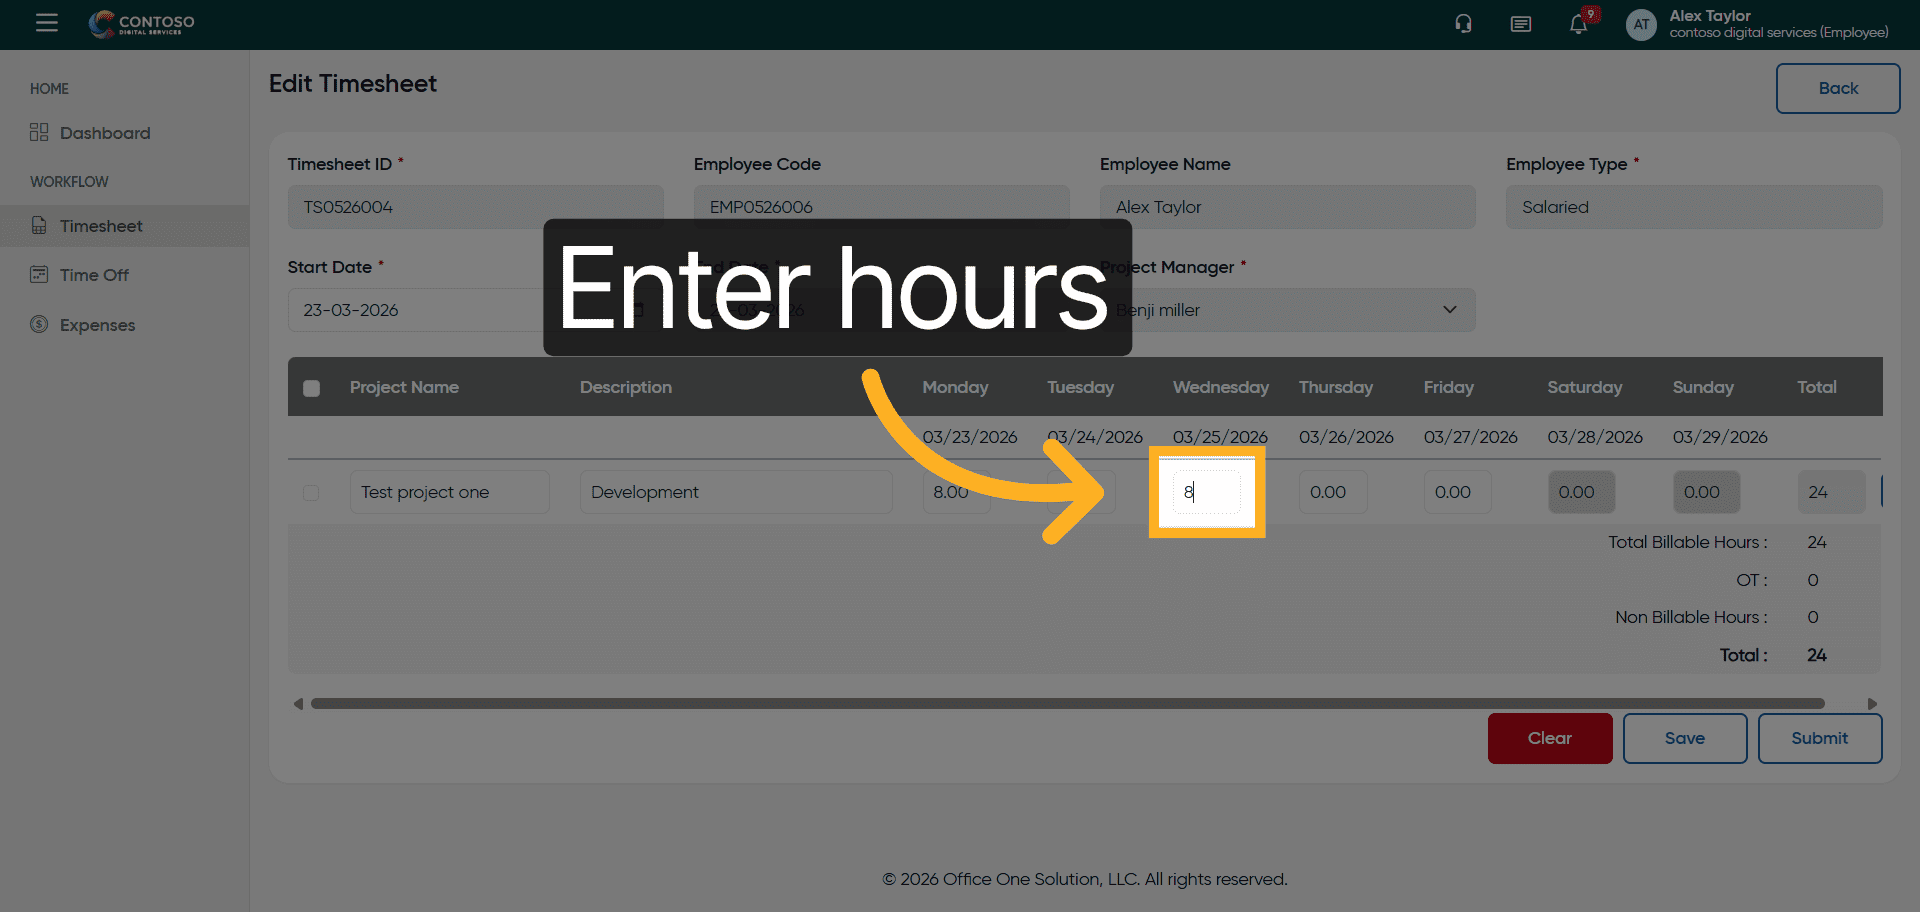
16. Confirm Hours Entry
Enter the hours again to confirm the updated time worked for accuracy.
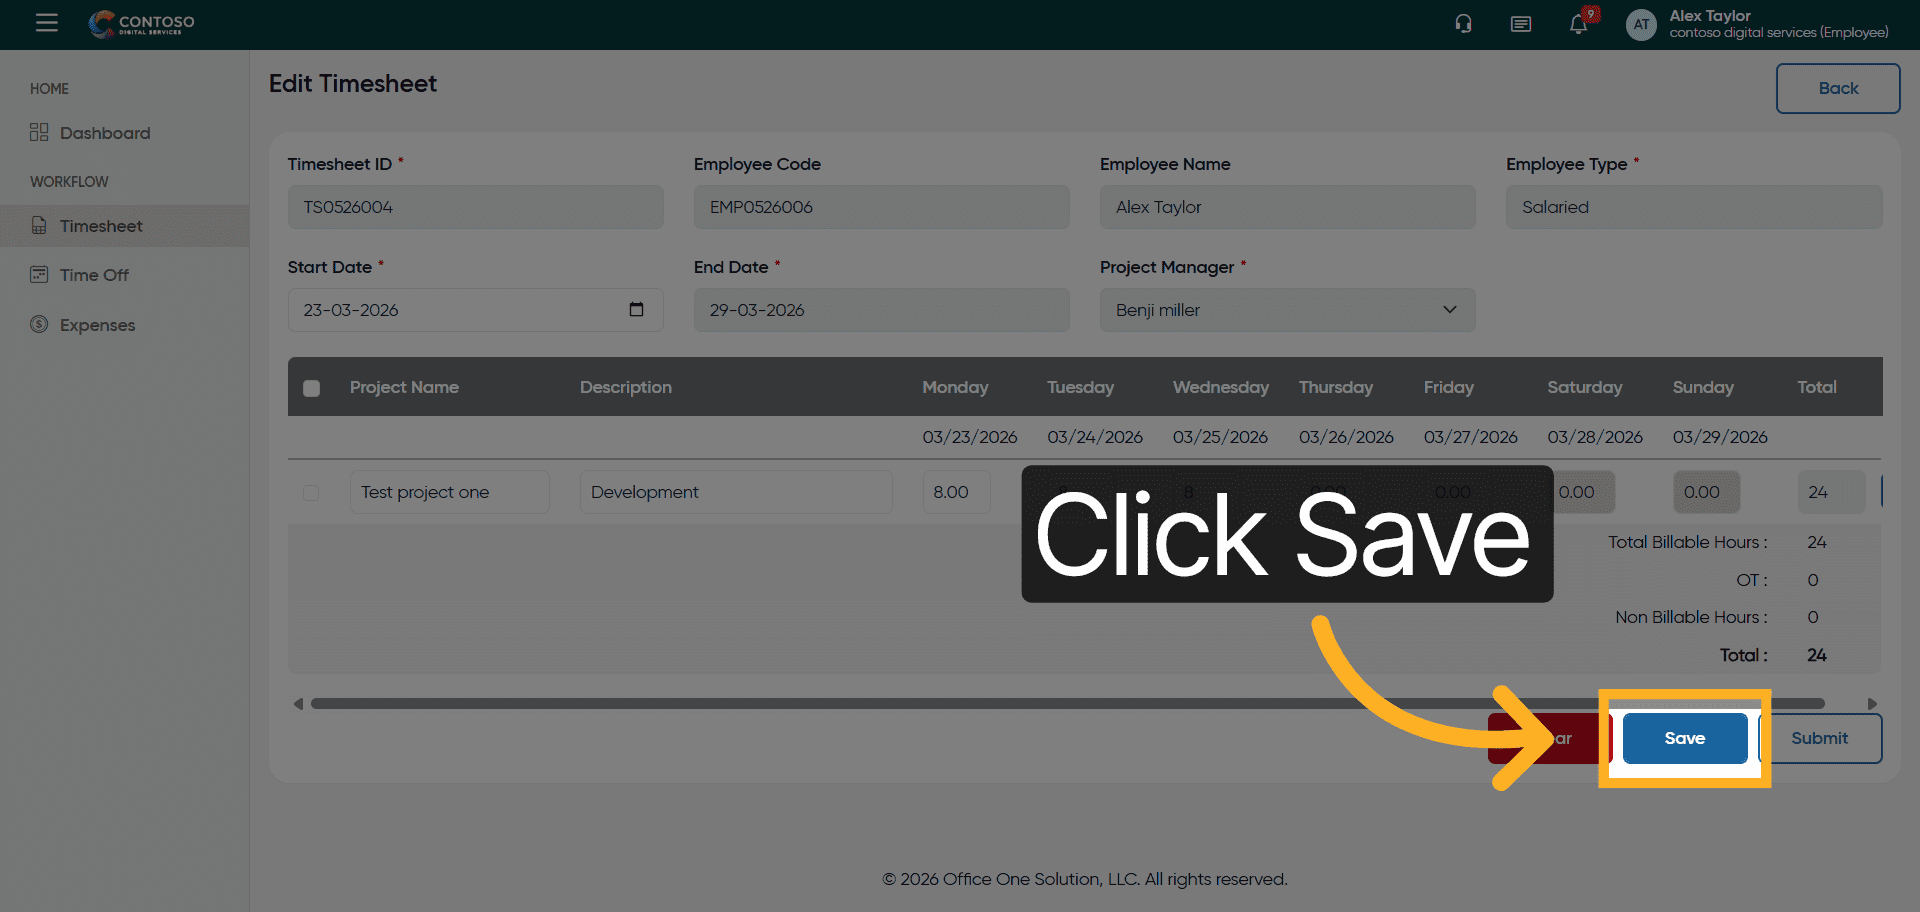
17. Save Edited Entry
Click the Save button to apply your changes to the timesheet entry.
18. Open Timesheet Options
Click here to open the options menu for managing your timesheet entry.
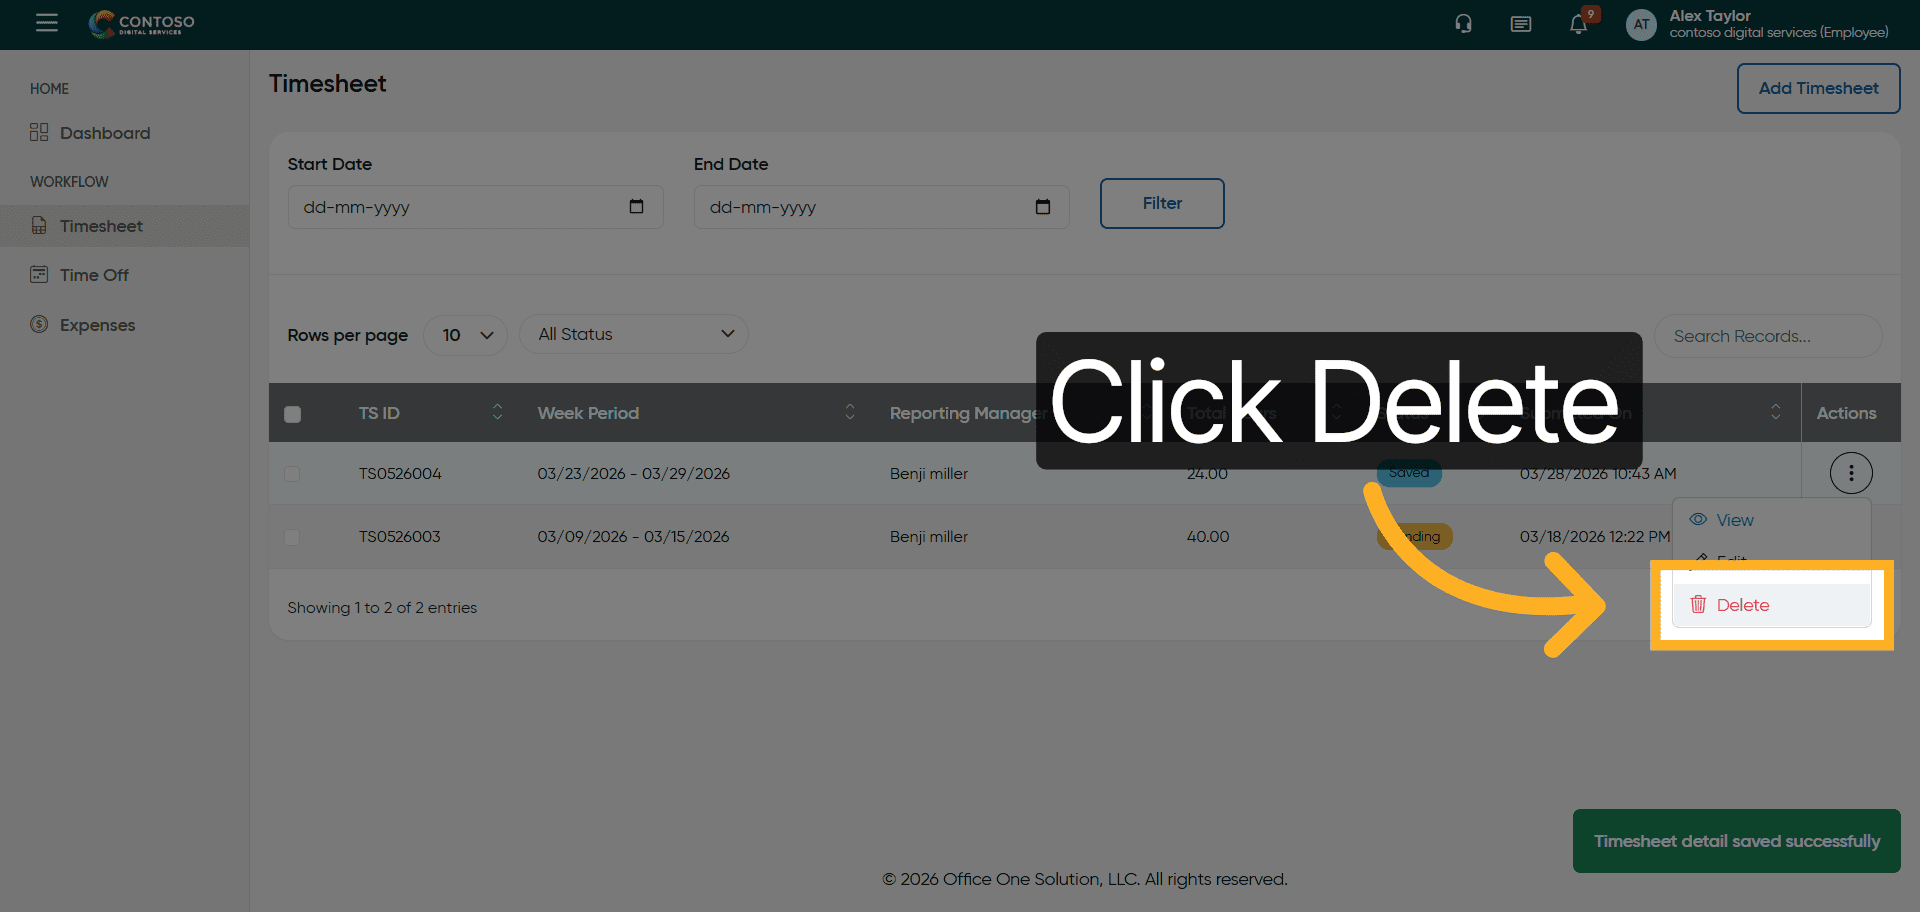
19. Delete Timesheet Entry
Click the Delete button to remove the selected timesheet entry from your records.
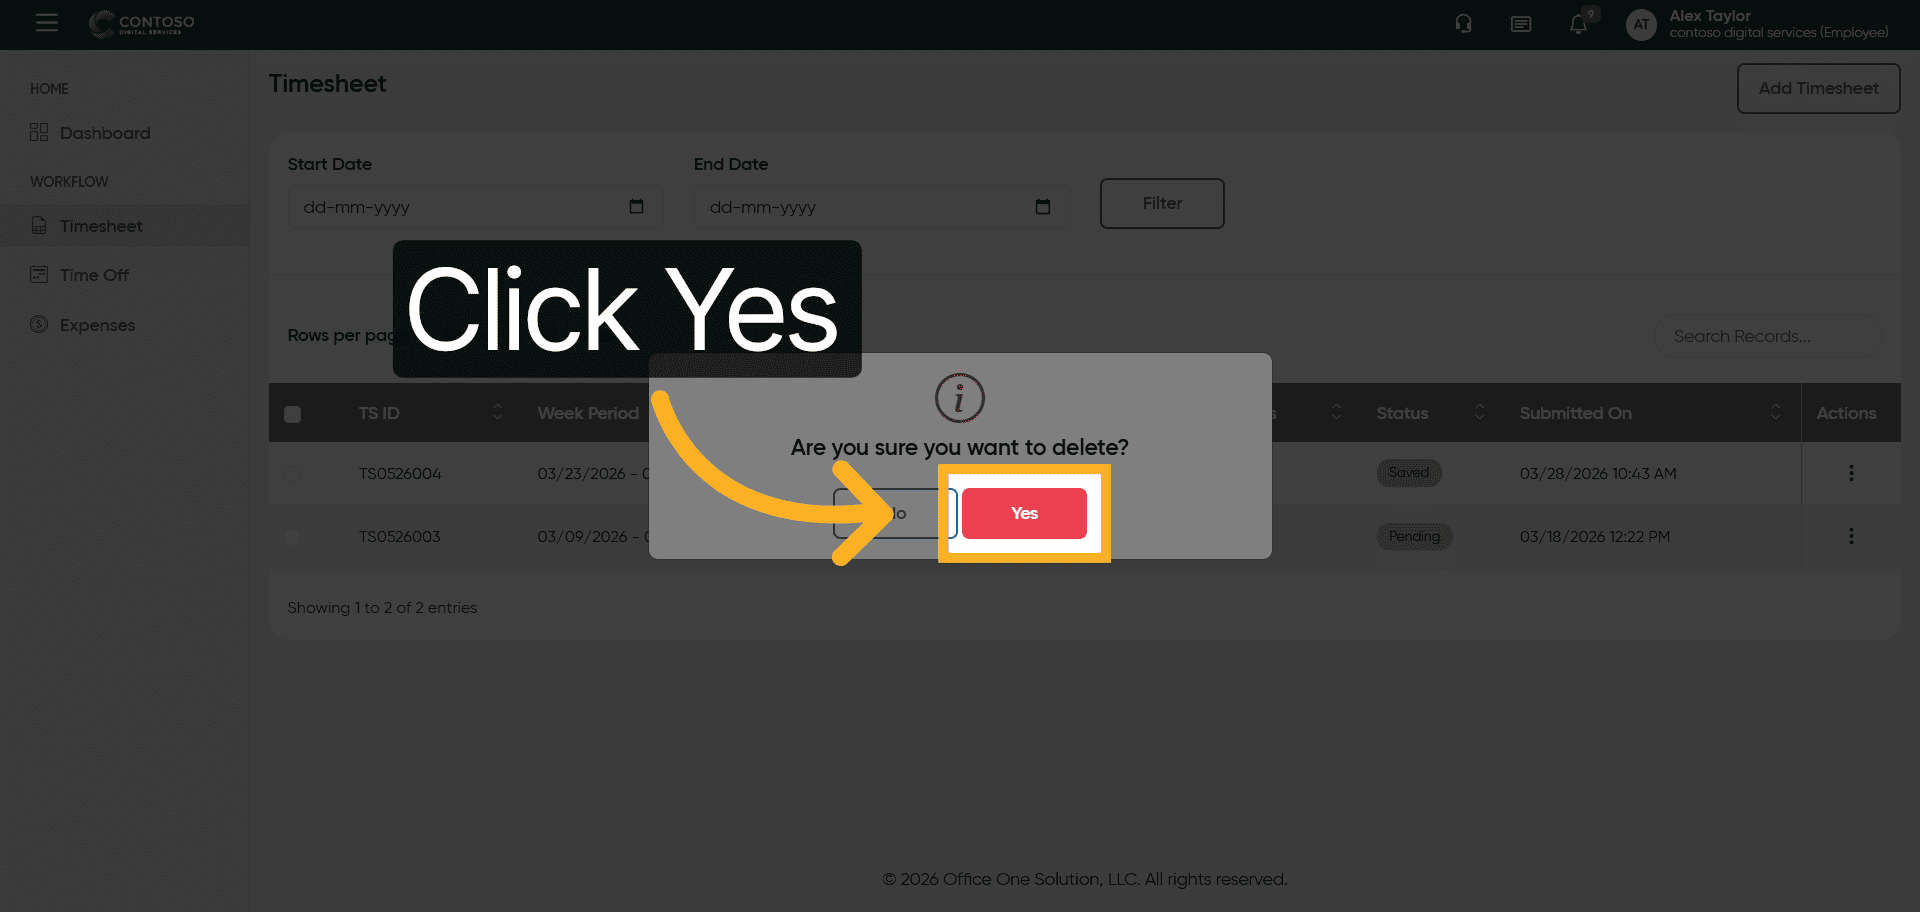
20. Confirm Deletion
Click Yes to confirm the deletion of the timesheet entry.
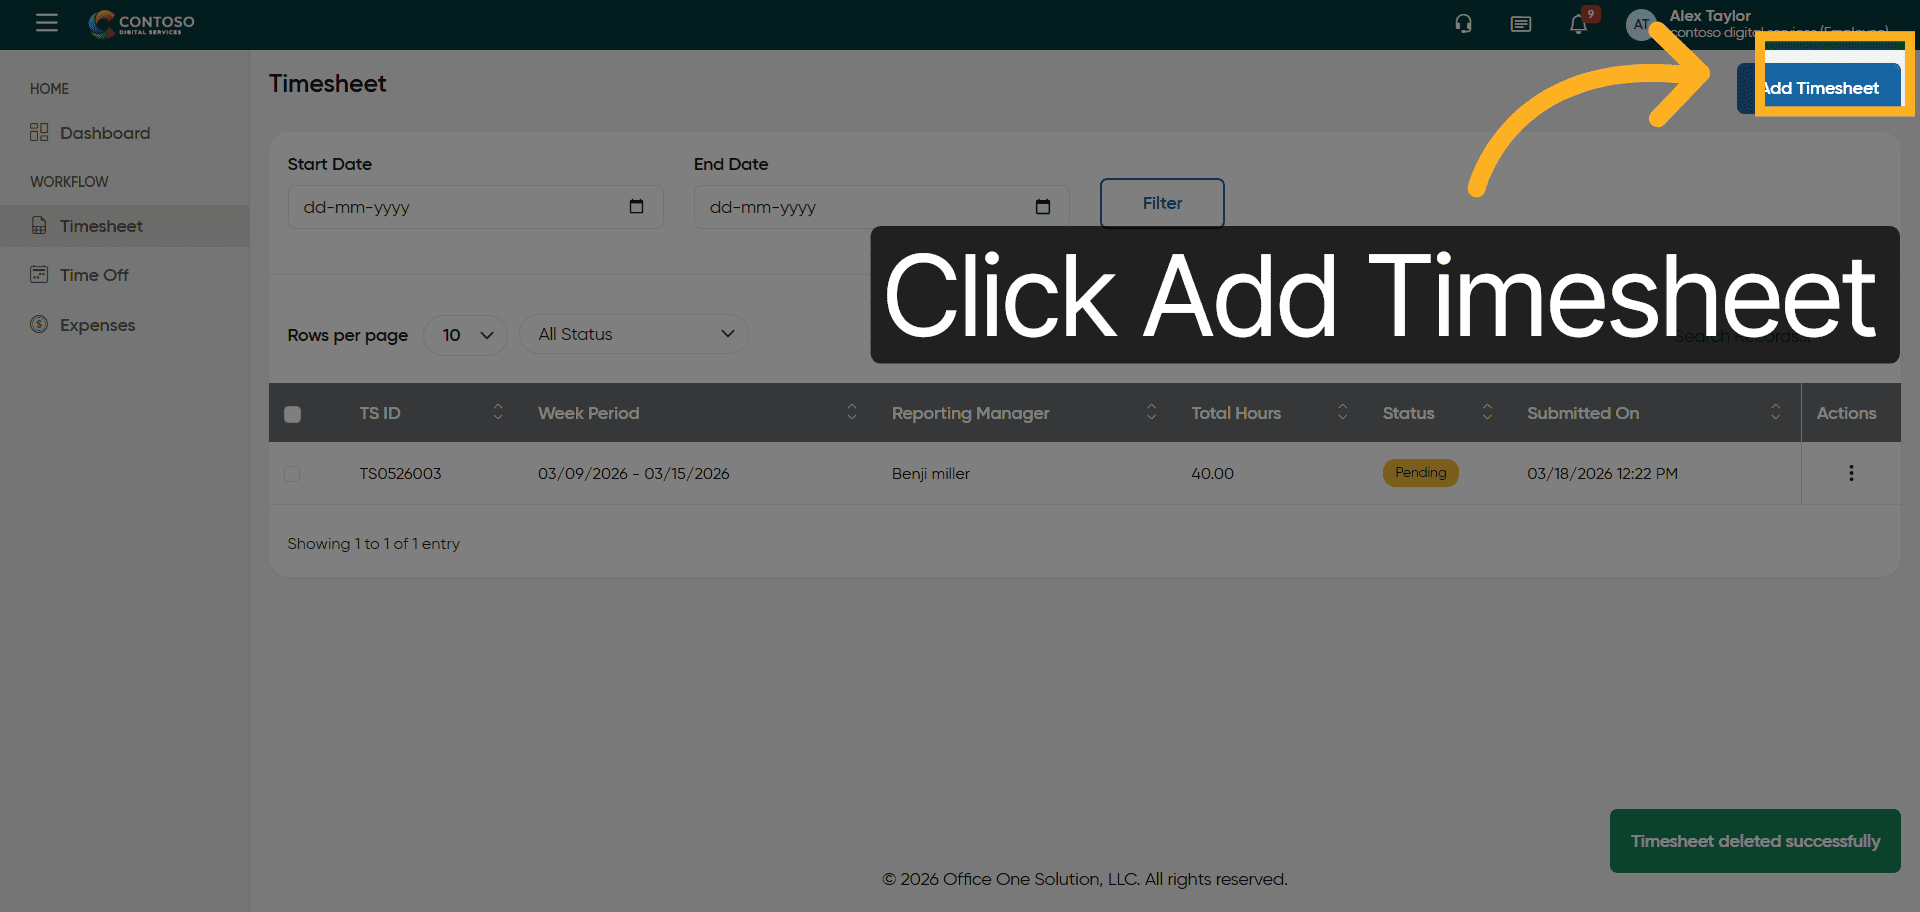
21. Add New Timesheet Entry
Click the Add Timesheet button to start creating a new timesheet record.
22. Select Project Name Field
Click the Project Name field to specify the project for your new timesheet entry.

23. Enter Project Name
Enter the project name to associate your timesheet entry with the correct assignment.
24. Specify Work Category
Enter the work category, such as Development, to classify your timesheet hours.
25. Input Hours Worked
Enter the number of hours worked for the project in the hours field.
26. Confirm Hours Entry
Enter the hours again to ensure your timesheet entry is accurate.
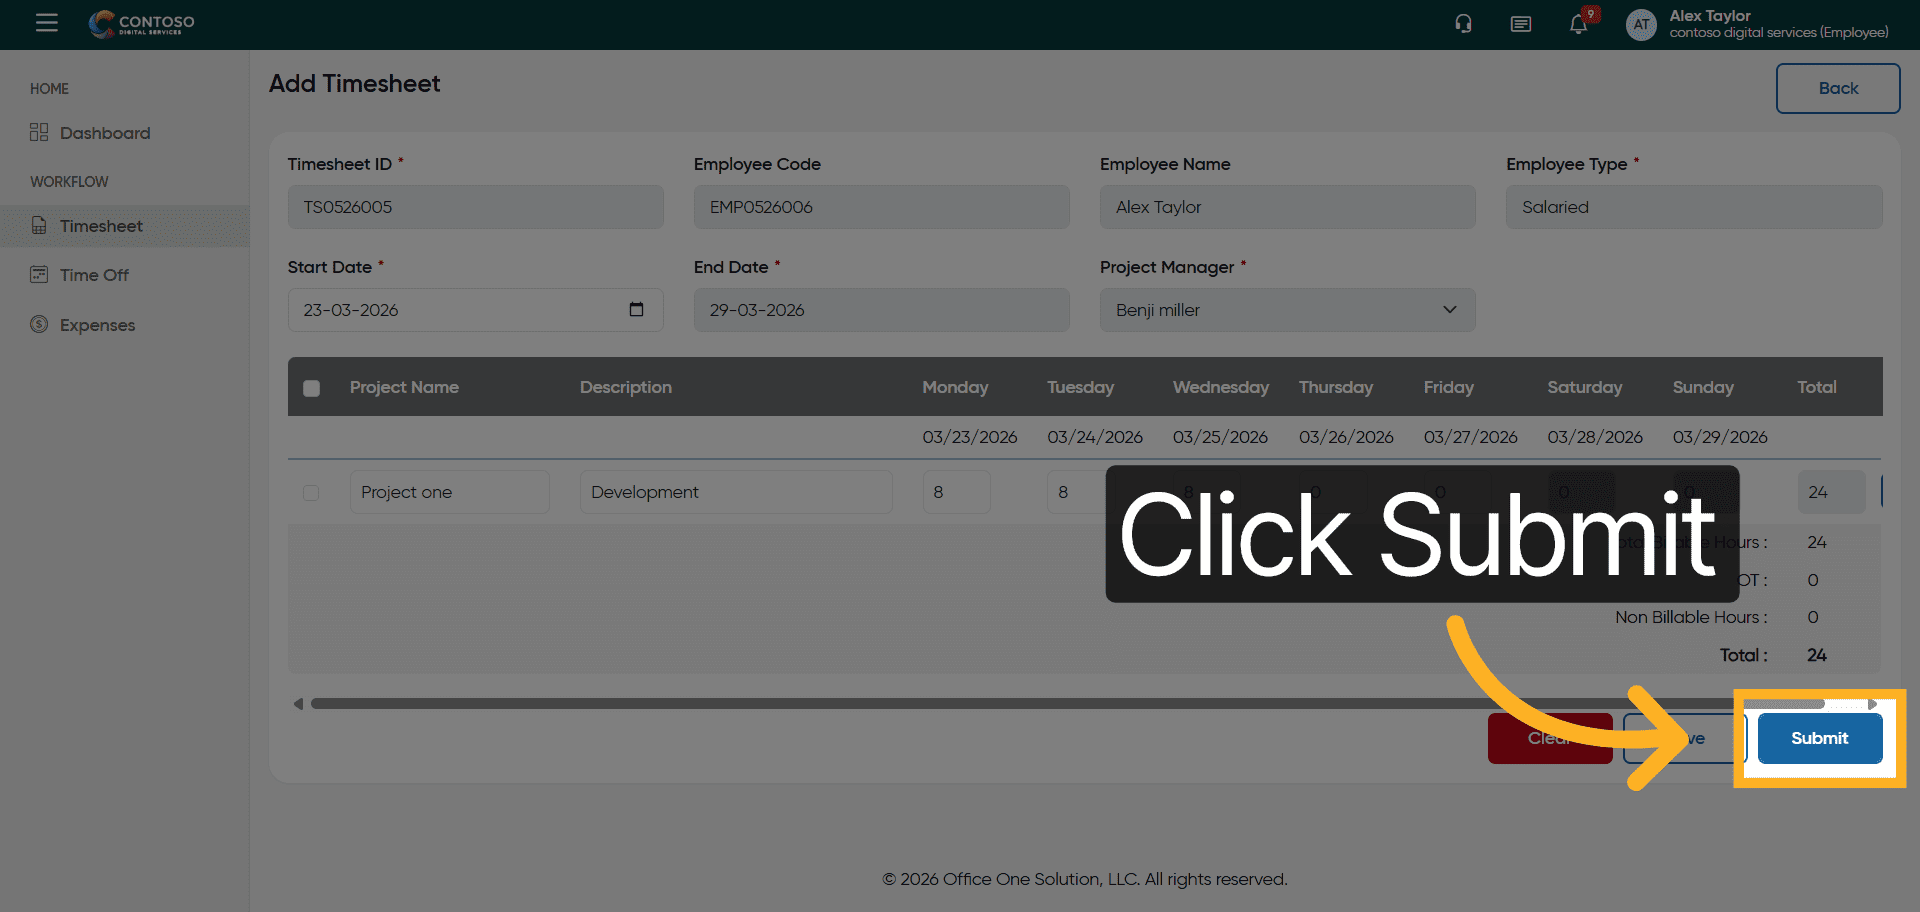
27. Submit Timesheet
Click the Submit button to finalize and send your timesheet for approval.
After completing this training, you will be able to efficiently add, edit, delete, and submit timesheet entries using Office 1 Solution. Practice these steps to ensure accurate tracking and timely submission of your work hours.